
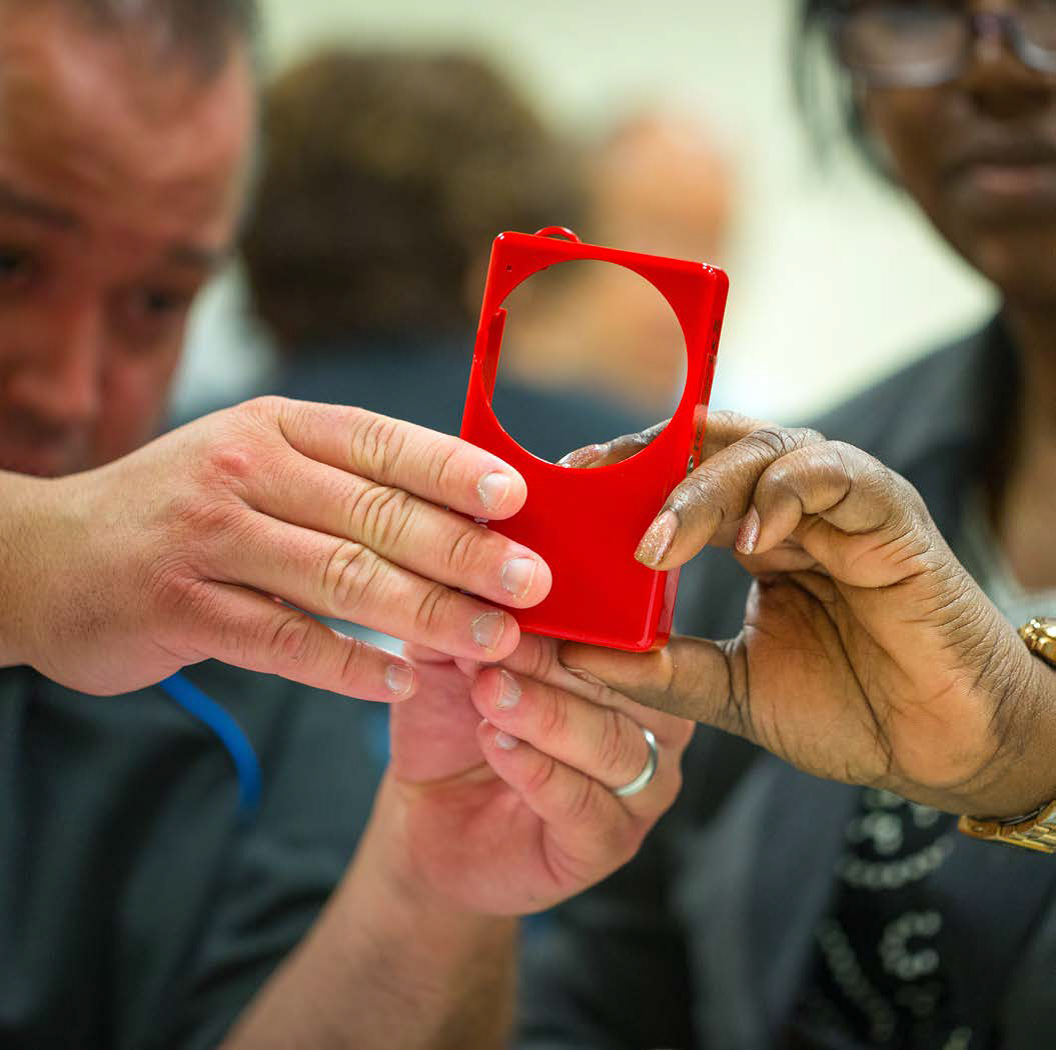
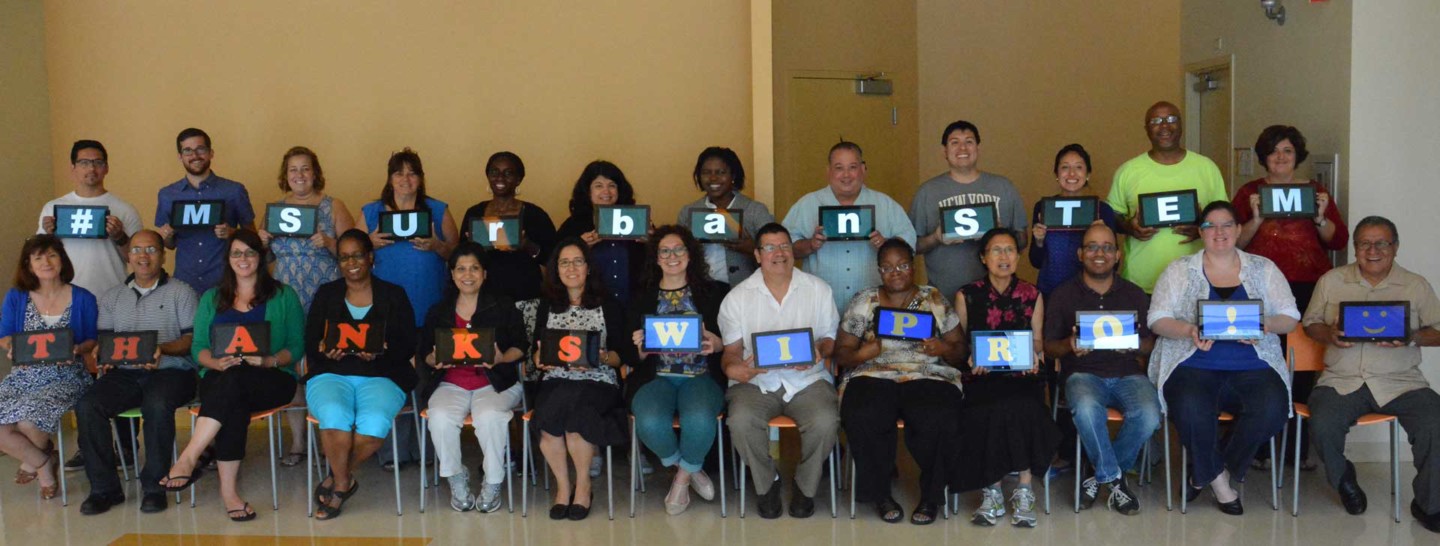
The MSU-WIPRO STEM & Leadership Teaching Fellowship program is the culmination of the partnership between global
IT giant Wipro, Chicago Public Schools, and Michigan State University's College of Education.
Fellows participate in an innovative year-long integrated learning experience to build STEM teachers' capacity and empower them to lead and inspire transformative innovative practices in urban K-12 schools.
I am grateful to be a member of the inaugural cohort in creating, collaborating and building STEM capacity among fellow urban teachers for the benefit of students, teachers, staff and the entire school community.

Science, Technology, Engineering and Math
Explore. Create. Share
Explore. Create. Share
One area of focus was TPACK which considers how technology integrate into teaching. TPACK stands for Technology, Pedagogical, and Content Knowledge and the video below from one of our instructors gives a quick introduction.
Please note the video is not meant to be an in-depth view.
Please note the video is not meant to be an in-depth view.

Roots of STEM - eBook Lesson
This book is a unique resource for educators. It provides 25 STEM lessons for teaching a wide range of content. While this book is primarily geared towards K-12 educators in the STEM fields, it offers ideas for teachers across disciplines. The reader of this book is provided with a plethora of ideas and resources for expanding the lesson to individualized context.
Click For an eBook Lesson
www.msuurbanstem.org/books-by-fellows/roots-of-stem/
My contribution begins on page 17.
In the following book, 25 STEM educators in Chicago Public Schools reflect on a yearlong experience with the MSU-Wipro STEM & Leadership Fellowship program.As they look back at their year of transition, they share the experiences that led them to become educators; their present struggles, joys, and motivations; and the journeys that lie ahead. This book is a collection of what they deeply, truly believe, and as such can serve as a resource as well as a source of inspiration to other educators.
www.msuurbanstem.org/books-by-fellows/this-i-believe/
My contribution begins on page 1.
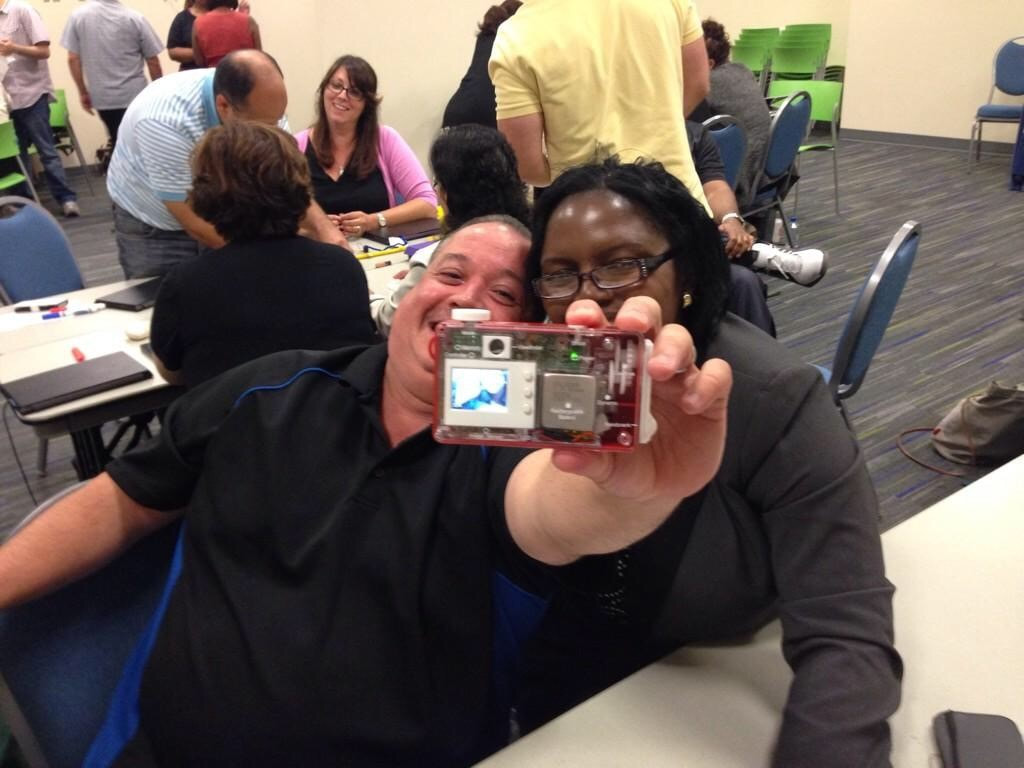
Creation Station:
Create a paper cut out mask.
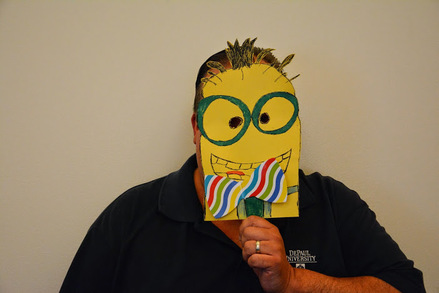
Photo Assignment:
In your Tech Crew group find examples of the letter E in everyday objects.
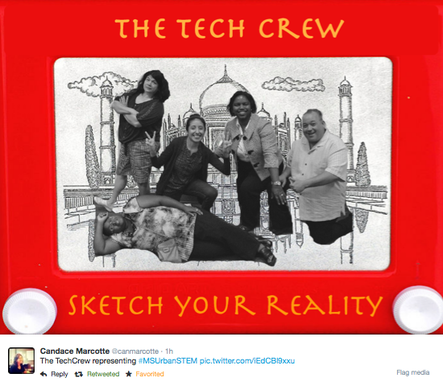
Tech Crew: Angelica, Chrissy, Leslie and Sussan

|

|

|
Nursery Rhyme:
Tech Crew Nursery Rhyme remix with TPACK (begins at the 2:00 minute mark)
(SING ALONG USING TWINKLE TWINKLE LITTLE STAR MELODY)
TPACK, TPACK STRATEGIES
AS A TEACHER STARTS WITH ME
SEE THE POSSIBILITIES
HANDS ON BUILDING INQUIRY
JOURNEY TO DISCOVERY
USING CREATIVITY
TPACK ,TPACK, STRATEGIES
AS A TEACHER STARTS WITH ME
Create a machine that launches a projectile:
The farthest or the most accurate aim.
Champions!
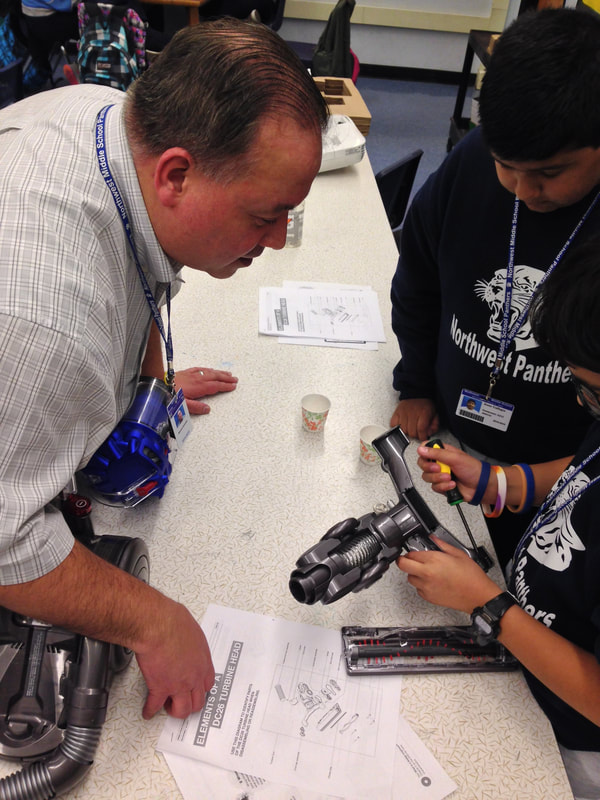
Northwest Middle School
DreamIT Project
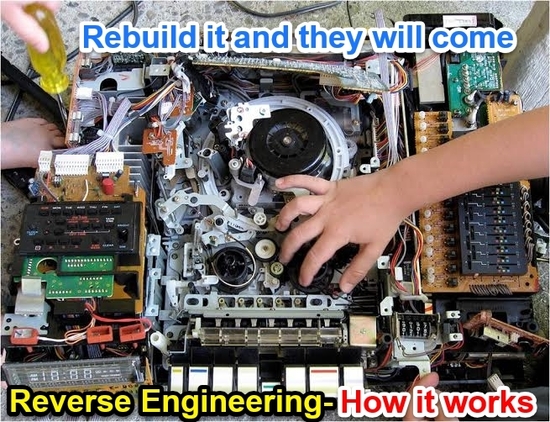
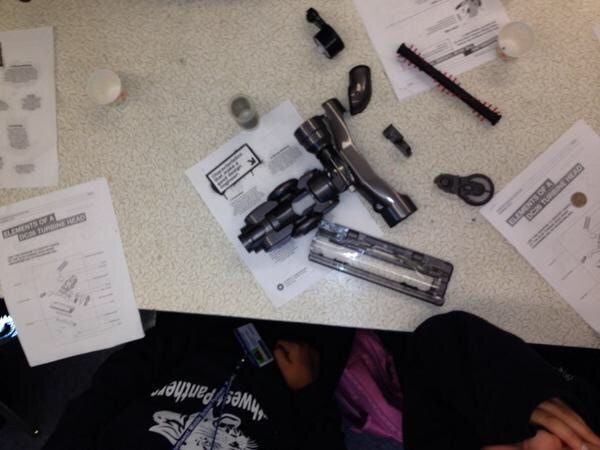
S.T.E.M connections through Reverse Engineering
|
|
DreamIT
S.T.E.M connections through Reverse Engineering
Let us take it apart and see how it works!!
Northwest Middle school students will gain the learning experience of disassembling and reassembling older and modern engineering devices. They will figure out how those devices such as a toaster, blender, vacuum cleaner, keyboard, or coffee maker which surrounds them on a daily basis connect to S.T.E.M. disciplines. Students will learn the history of the device, the reason it was develop, what’s the inside of the device and how the inside parts of the device work. Overall. Northwest Middle School students will look at how science, technology, engineering and math assisted in creating everyday devices.
Students will discover reverse engineering is the method of disassembling with a well thought out breakdown, records and reporting. Their objective is to successful reassemble the device to working order with either an improvement, removal of unnecessary parts, reverse functions or return the device to its normal operation. The process of reverse engineering will demonstrate to students they need not be a genius to comprehend, construct or improve devices. Students will learn to view technology in a different perspective. They will shift from being only consumers of technology with a disinterest, I don’t care or know how it works perspective to a more of a natural curiosity. If a students’ natural curiosity is not encouraged, their inquisitiveness gradually disappears and their indifference and fear with the science, technology, engineering and math disciplines begin to form.
Students ought to stop seizing a device and becoming absorbed with how they can exploit the device but instead be amazed on how it works from an S.T.E.M. perspective. The disassembling and reassembling will generate S.T.E.M. connections and enable students to construct other questions they want to explore. Some key questions they will need to ponder are the following:
At the beginning of each reverse engineering project, students will explore how it all fits together and as they disassemble record what they see and write notes on how they think it works. They will work in groups and after disassembling describe where the parts were located and how they took it apart. They will evaluate and contrast the different parts, explain the device’s design and task, and describe the key components with their function. Ultimately, they will provide design suggestions and improvement.
The reverse engineering process will demonstrate through the use of S.T.E.M. disciplines that many companies and ordinary individuals strive to make designs better, cheaper, stronger and easier to use. These groups of professionals and the process of building and rebuilding is the part of a S.T.E.M profession that is fascinating. Students will be aware of the challenge and the excitement of learning is not necessarily knowing the answers but discovering them.
DreamIT
FOCUS GROUPS
Feedback I received from teacher and student focus groups.
In the DreamtIT v 2.0 phase, no videos were planned. For the focus groups, I decided to include several videos. I was fortunate to include the videos since the groups deemed they were an excellent introduction to the engineering design process and the science behind the vacuum. They found the videos to be relevant, instructive and the right length for instruction.
The first video viewed detailed how the majority of prototypes in the engineering design process fail. The video allowed for discussion on how we learn by failing. During the discussion, I projected additional images of other inventions that started out as failures but were eventually successful. The focus groups thought the examples displayed were attention-grabbing especially the everyday items such as the light bulb. Each focus group estimated how many Dyson vacuum prototypes failed before there was a successful one. After displaying the number of Dyson prototypes that actually failed (5127), each focus group found the actual numbers to reinforce the idea we learn from our mistakes. The focus groups considered the video and the discussion that followed to be a vital part in accepting any failures in reverse engineering the Dyson vacuum.
The second and third videos demonstrated the Root Cyclone with the Dyson core separator process. The focus groups found these videos provided a foundation on how the machine was to operate before they tested and disassembled the turbine head.
The fourth and final concluding video which I had translated from Japanese version provided a powerful visual on the technology behind the vacuum and the g-force generated in the vacuum from the cyclone. The focus groups thought the video comparing the g-force in the vacuum to other items like a race car and washing machine made it easier to grasp the acceleration generated in the Dyson vacuum.
Although the focus groups were provided with disassembling instructions and guiding questions, many members wanted to take apart the vacuum without reviewing either the instructions or questions. It was particularly apparent during the student focus group that they were eager to disassemble. Thus, in future lessons, it will be optional for students to reference the disassembling instructions or review the guiding questions before taking apart the vacuum.
What changes were made or not made to your DreamIT plan?
My teacher focus group considered utilizing the DreamIT project as thematic unit. They envisioned a grade level team where each subject teacher concentrated on a different aspect of the project. The math teacher would focus on the design and engineering specifications such as the size, weight and volume of parts of the vacuum. The science teacher would discuss the cyclone technology, g-force, centripetal and centrifugal force while the social studies teacher on the history of inventions. As a result of the teacher focus group feedback, I decided to add a social studies component to the DreamIT project, which I implemented with the student focus group.
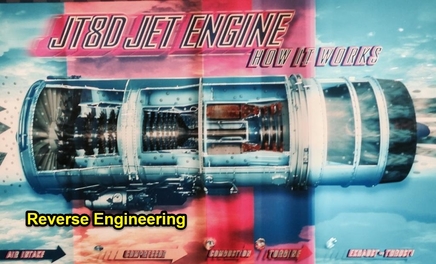
In the student focus group, I integrated discussions of characteristics that make a good engineer, inventions through time with a matching activity and a history of inventors along with their backgrounds and inventions. The inventions studied were the following: James Dyson (Bagless vacuum cleaner 1993), Alec Issigonis (The “Mini” car 1959), Fiona Fairhurst (The “Fastskin swimsuit 2009), Frank Whittle (The jet engine 1930), and Mary Anderson (Windshield wipers 1903).
It required more than a class period to complete the DreamIT project, yet many focus group members wanted to continue to construct. In response to their enthusiasm, I researched additional activities, which would work with the project. In my search, I found a template students can use to build a cyclone, attach to the vacuum and watch how it operates. Students will use this template in the next implementation.
The focus groups were engaged with the Dyson vacuum. Each group had fun taking it apart and discovering how it operated. The videos and discussions assisted the groups with the reverse engineering process and the guiding questions none of which were altered assisted group members with comprehending and recognizing the science, technology, engineering and math behind the engineering design. I am excited about the projects success and the modifications to the DreamIT project. I look forward to the next round of implementation.
DreamIT
First Round Implementation
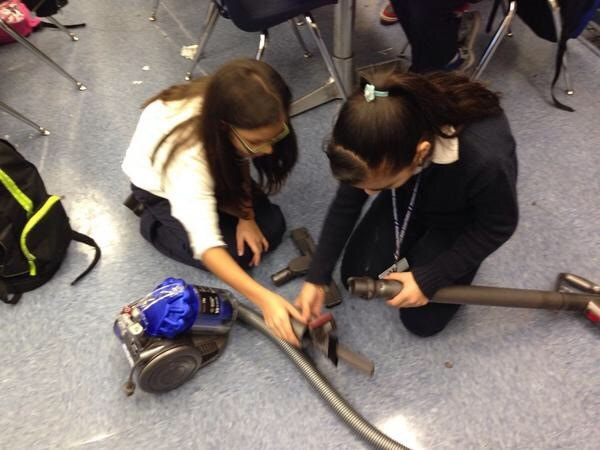
My students operated the Dyson vacuum by picking up various items from the lab floor. I wanted them to observe the vacuum in working order before they started the reversed engineering process. On the digital projector, I played a video which detailed how the majority of prototypes in the engineering design process fail. We watched on how we can learn by failing and that devices do not just appear but often it takes many failures before you get one success. Afterwards, I projected images of the light bulb and post note which started out as failures but were eventually successful. I explained Edison needed 10,000 attempts to get one working light bulb. I posed the question for them to guess how many times Dyson tried until he came up with a working bag less vacuum. Student’s estimates were significantly lower than the actual amount of 5,127 the amount of attempts emphasized the point we learn by failing. We viewed two additional videos which demonstrated the Root Cyclone with the Dyson core separator process and the g- force generated within the vacuum. Students found the g-force video presented a clear understanding of the force in the vacuum especially compared to g-force created by race cars, tornados, and washing machines.
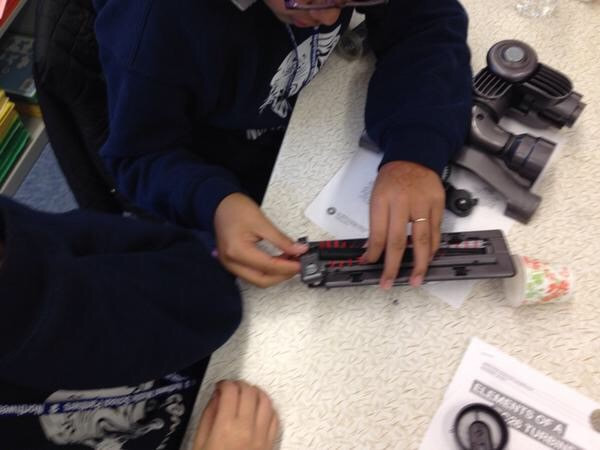
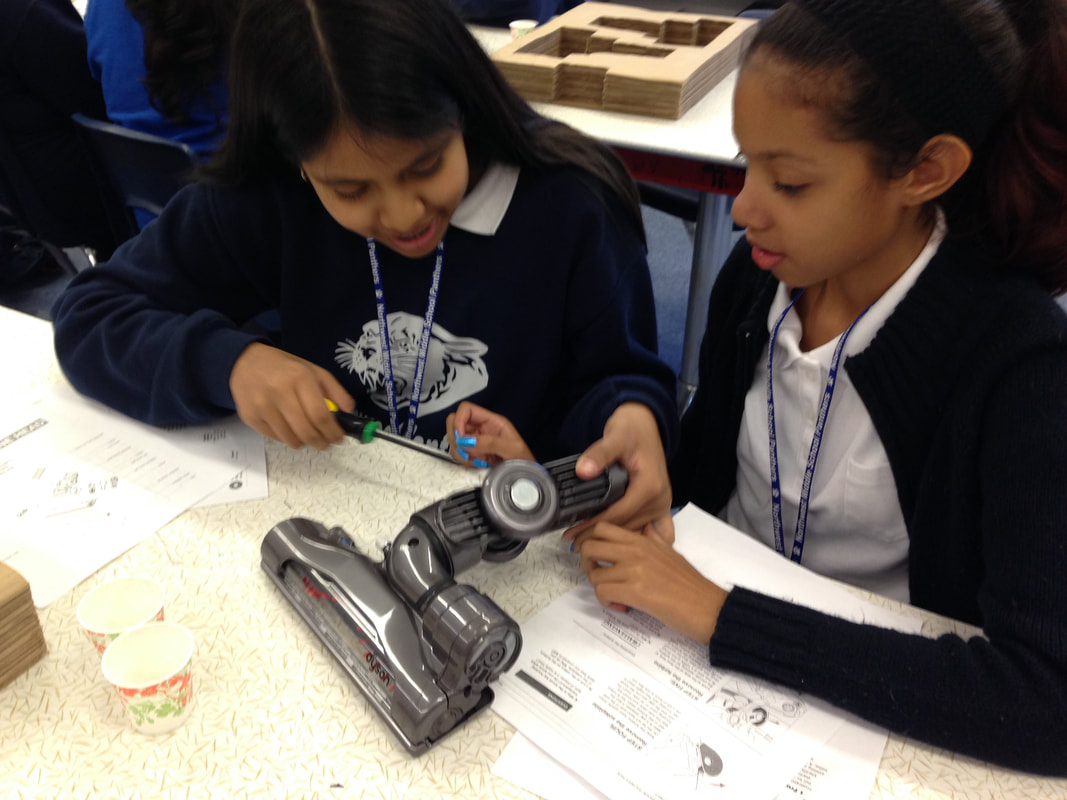
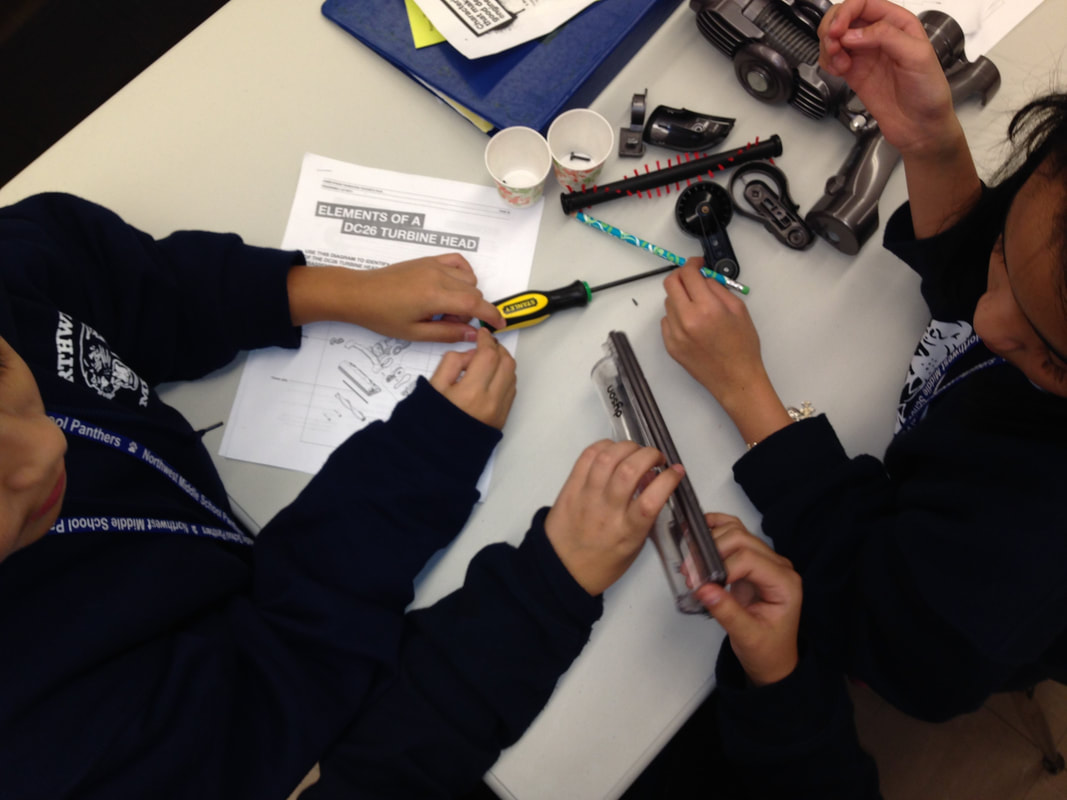
As students disassembled their vacuum, they read their guiding questions and they think, paired, shared their responses to the questions. As a class, we also reviewed the purpose of a particular part, the material used and the thoughts behind the choice of design. Our discussions lead to some of the concerns engineers may have thought consumers would encounter with the vacuum. Additional, discussions lead to how tools and hoses can be easily attached and removed, and how filters were made and stored to be easily removed and cleaned.
Students discovered many of the vacuum screws were difficulty to remove but found the use of fasteners and clips simple to remove. Students disassembled the turbine tool hose assembly, end cap assembly, duct cover, axial turbine assembly, belt cover seal, belt cover seal assembly, flicker strip, brush bar assembly, sole plate wheel, and axles. Students sorted out the their disassembled parts and described the different materials used and revealed how the transparent sections were effective in determining whether the vacuum was working properly. They also found the helpful use of color to emphasize certain parts of the vacuum.
We reviewed design specifications of the vacuum and talked about areas such aesthetics, cost, customer needs, storage, safety, size, and the certain functions the engineers decided on. Specifically, we measured the vacuum specifications size in inches, weight in pounds, and bin volume capacity.
After students reverse engineered and reassembled the vacuum they completed an exit slip on the following culminating questions:
The response to the culminating questions provided evidence students understood that engineers strive to make designs better, cheaper, stronger and easy for people to use. Students found the challenge and the excitement of reverse engineering is not necessarily knowing the answers but discovering the
S.T.E.M connections through Reverse Engineering
Let us take it apart and see how it works!!
Northwest Middle school students will gain the learning experience of disassembling and reassembling older and modern engineering devices. They will figure out how those devices such as a toaster, blender, vacuum cleaner, keyboard, or coffee maker which surrounds them on a daily basis connect to S.T.E.M. disciplines. Students will learn the history of the device, the reason it was develop, what’s the inside of the device and how the inside parts of the device work. Overall. Northwest Middle School students will look at how science, technology, engineering and math assisted in creating everyday devices.
Students will discover reverse engineering is the method of disassembling with a well thought out breakdown, records and reporting. Their objective is to successful reassemble the device to working order with either an improvement, removal of unnecessary parts, reverse functions or return the device to its normal operation. The process of reverse engineering will demonstrate to students they need not be a genius to comprehend, construct or improve devices. Students will learn to view technology in a different perspective. They will shift from being only consumers of technology with a disinterest, I don’t care or know how it works perspective to a more of a natural curiosity. If a students’ natural curiosity is not encouraged, their inquisitiveness gradually disappears and their indifference and fear with the science, technology, engineering and math disciplines begin to form.
Students ought to stop seizing a device and becoming absorbed with how they can exploit the device but instead be amazed on how it works from an S.T.E.M. perspective. The disassembling and reassembling will generate S.T.E.M. connections and enable students to construct other questions they want to explore. Some key questions they will need to ponder are the following:
- How will they record their observations?
- What does the device do?
- How will they test if it works?
- How will they take notes on the disassembling process?
- How does it function?
- How can I improve or change the device?
At the beginning of each reverse engineering project, students will explore how it all fits together and as they disassemble record what they see and write notes on how they think it works. They will work in groups and after disassembling describe where the parts were located and how they took it apart. They will evaluate and contrast the different parts, explain the device’s design and task, and describe the key components with their function. Ultimately, they will provide design suggestions and improvement.
The reverse engineering process will demonstrate through the use of S.T.E.M. disciplines that many companies and ordinary individuals strive to make designs better, cheaper, stronger and easier to use. These groups of professionals and the process of building and rebuilding is the part of a S.T.E.M profession that is fascinating. Students will be aware of the challenge and the excitement of learning is not necessarily knowing the answers but discovering them.
DreamIT
FOCUS GROUPS
Feedback I received from teacher and student focus groups.
In the DreamtIT v 2.0 phase, no videos were planned. For the focus groups, I decided to include several videos. I was fortunate to include the videos since the groups deemed they were an excellent introduction to the engineering design process and the science behind the vacuum. They found the videos to be relevant, instructive and the right length for instruction.
The first video viewed detailed how the majority of prototypes in the engineering design process fail. The video allowed for discussion on how we learn by failing. During the discussion, I projected additional images of other inventions that started out as failures but were eventually successful. The focus groups thought the examples displayed were attention-grabbing especially the everyday items such as the light bulb. Each focus group estimated how many Dyson vacuum prototypes failed before there was a successful one. After displaying the number of Dyson prototypes that actually failed (5127), each focus group found the actual numbers to reinforce the idea we learn from our mistakes. The focus groups considered the video and the discussion that followed to be a vital part in accepting any failures in reverse engineering the Dyson vacuum.
The second and third videos demonstrated the Root Cyclone with the Dyson core separator process. The focus groups found these videos provided a foundation on how the machine was to operate before they tested and disassembled the turbine head.
The fourth and final concluding video which I had translated from Japanese version provided a powerful visual on the technology behind the vacuum and the g-force generated in the vacuum from the cyclone. The focus groups thought the video comparing the g-force in the vacuum to other items like a race car and washing machine made it easier to grasp the acceleration generated in the Dyson vacuum.
Although the focus groups were provided with disassembling instructions and guiding questions, many members wanted to take apart the vacuum without reviewing either the instructions or questions. It was particularly apparent during the student focus group that they were eager to disassemble. Thus, in future lessons, it will be optional for students to reference the disassembling instructions or review the guiding questions before taking apart the vacuum.
What changes were made or not made to your DreamIT plan?
My teacher focus group considered utilizing the DreamIT project as thematic unit. They envisioned a grade level team where each subject teacher concentrated on a different aspect of the project. The math teacher would focus on the design and engineering specifications such as the size, weight and volume of parts of the vacuum. The science teacher would discuss the cyclone technology, g-force, centripetal and centrifugal force while the social studies teacher on the history of inventions. As a result of the teacher focus group feedback, I decided to add a social studies component to the DreamIT project, which I implemented with the student focus group.
In the student focus group, I integrated discussions of characteristics that make a good engineer, inventions through time with a matching activity and a history of inventors along with their backgrounds and inventions. The inventions studied were the following: James Dyson (Bagless vacuum cleaner 1993), Alec Issigonis (The “Mini” car 1959), Fiona Fairhurst (The “Fastskin swimsuit 2009), Frank Whittle (The jet engine 1930), and Mary Anderson (Windshield wipers 1903).
It required more than a class period to complete the DreamIT project, yet many focus group members wanted to continue to construct. In response to their enthusiasm, I researched additional activities, which would work with the project. In my search, I found a template students can use to build a cyclone, attach to the vacuum and watch how it operates. Students will use this template in the next implementation.
The focus groups were engaged with the Dyson vacuum. Each group had fun taking it apart and discovering how it operated. The videos and discussions assisted the groups with the reverse engineering process and the guiding questions none of which were altered assisted group members with comprehending and recognizing the science, technology, engineering and math behind the engineering design. I am excited about the projects success and the modifications to the DreamIT project. I look forward to the next round of implementation.
DreamIT
First Round Implementation
My students operated the Dyson vacuum by picking up various items from the lab floor. I wanted them to observe the vacuum in working order before they started the reversed engineering process. On the digital projector, I played a video which detailed how the majority of prototypes in the engineering design process fail. We watched on how we can learn by failing and that devices do not just appear but often it takes many failures before you get one success. Afterwards, I projected images of the light bulb and post note which started out as failures but were eventually successful. I explained Edison needed 10,000 attempts to get one working light bulb. I posed the question for them to guess how many times Dyson tried until he came up with a working bag less vacuum. Student’s estimates were significantly lower than the actual amount of 5,127 the amount of attempts emphasized the point we learn by failing. We viewed two additional videos which demonstrated the Root Cyclone with the Dyson core separator process and the g- force generated within the vacuum. Students found the g-force video presented a clear understanding of the force in the vacuum especially compared to g-force created by race cars, tornados, and washing machines.
As students disassembled their vacuum, they read their guiding questions and they think, paired, shared their responses to the questions. As a class, we also reviewed the purpose of a particular part, the material used and the thoughts behind the choice of design. Our discussions lead to some of the concerns engineers may have thought consumers would encounter with the vacuum. Additional, discussions lead to how tools and hoses can be easily attached and removed, and how filters were made and stored to be easily removed and cleaned.
Students discovered many of the vacuum screws were difficulty to remove but found the use of fasteners and clips simple to remove. Students disassembled the turbine tool hose assembly, end cap assembly, duct cover, axial turbine assembly, belt cover seal, belt cover seal assembly, flicker strip, brush bar assembly, sole plate wheel, and axles. Students sorted out the their disassembled parts and described the different materials used and revealed how the transparent sections were effective in determining whether the vacuum was working properly. They also found the helpful use of color to emphasize certain parts of the vacuum.
We reviewed design specifications of the vacuum and talked about areas such aesthetics, cost, customer needs, storage, safety, size, and the certain functions the engineers decided on. Specifically, we measured the vacuum specifications size in inches, weight in pounds, and bin volume capacity.
After students reverse engineered and reassembled the vacuum they completed an exit slip on the following culminating questions:
- What have you learn about by disassembling and reassembling the turbine apart?
- Which features enhance the performance of the machine?
- Which features enhance made it easy to use?
- Why did the engineers chose to fix parts together in a particular way?
- Why the engineers did chose the materials they used?
The response to the culminating questions provided evidence students understood that engineers strive to make designs better, cheaper, stronger and easy for people to use. Students found the challenge and the excitement of reverse engineering is not necessarily knowing the answers but discovering the
Reflection Update
The foundation of education is being flexible and adapting curriculum with instruction on an everyday basis. In the implementation of my DreamIT project, I have been able to make some positive changes based on focus groups feedback and the results of the first round of implementation. I have become skilled at recognizing my students learning styles which required at times a slower pace of instruction with more guided instruction while at others times necessitating a quicker pace and more freedom to experiment. At other stages of the reverse engineering project, I differentiated by the use of flexible grouping, oral responses, written responses, tempo, informational and inspirational videos, and hands-on activities while continuing to be dedicated to my reverse engineering goals. I was successfully with working with my students’ individuality and moving them forward in their learning.
Assessing students understanding and academic growth through-out any project lessons and instruction is a part of the learning process itself. In the article, “Ongoing Assessment and Performances of Understanding” it asserts students must go beyond the information given to them and create something new by reshaping, expanding, extrapolating from, applying, and building on what they already know. Students demonstrated their academic growth and understanding with reverse engineering by the use of thinking, pairing and sharing while they disassembled and reassembled the Dyson vacuum. Students focused on the science, technology and math used in the vacuum. They studied the engineering attribute such as choice and use of materials and examined the overall design layout and user friendly design.
My book review of The Design of Everyday Things and interview with the author Don Norman has provided additional resources with its stages, processes and human-centered design philosophy and procedure. In future DreamIT implementations, delving into the book with my students will make it possible to explore the design process even further with my students
My DreamIT project of Reverse Engineering is sticking. As stated in the “Teaching That Sticks”, I am becoming more skilled in making sure my DreamIT is understood, remembered and that it changes something within my students. I have used the six traits of keeping it simple, unexpected, concrete, credible, emotional and presenting a story to ensure my big idea sticks with my students. Thus, my teaching and learning is becoming more transformative, innovative, and I am producing multimodal experiences for my students.
Through the DreamIT project, my students explored the design process, design specifications, the science of force and cyclone technology. The reverse engineering activities were continuous and provided opportunities for students to experiment, discuss and collaborate. The activities left them wanting more. Accordingly, I will remain steadfast with challenging and enlightening my students with the disassembling and reassembly of the reverse engineering process.
Dream IT - Update
Implementing the Dream IT project has been academically engaging, inspiring, and definitely fun. Engaging my students in the reverse engineering process has emphasized that when students are able to work with their hands it helps them tap into their natural curiosity, builds patience and gives them a working knowledge how items are created, designed and functions. Students build on their STEM knowledge when they can touch, take it apart and reassemble devices. It enables them to have fun, engaging and meaningful academic discussions.
In the past, I have provided my students with opportunities to work with manipulatives and actual devices. Yet, I have strayed away from those hands on opportunities until this year. The Dream IT project has definitely refocused my passion on providing my students with a more balance instruction and the importance of hands on experience. Whether it is working with math and science manipulatives, 3D printers, Makey Makey, programming robots or reverse engineering a product, students need a balance curriculum where they have a mix of pencil and paper, technology programs and working with actual items.
The reverse engineering Dream IT project emphasized one of the MSU-Wipro discussions we had this past summer. That students and educators often learn the results and not the process. Thus, we should not focus necessarily about starting at point A working to point B and and onto C but it is important in teaching and learning in remembering and learning from the cloud between B and C. How we all can experience, discuss, and comprehend the path that brought science, technology, engineering and math history and solutions to point C. Consequently, working with the Dyson vacuums allowed for exploration and discussion on how inventors, designers and a lot of other individuals learn by failing. They ways they got stuck and how they made it through their failures.
My students through the Dream IT project gained an understanding that we all tend to focus on the final prototype and the success but not the whole story of confusion and failures along the way. It was a learning experience for my students to grasp that everyone gets stuck. It helped with diminishing their impression that devices just magically appear and an important lesson and discovery for them to realize we all fail but by getting stuck is how we all learn how to get unstuck. We learn all by failing.
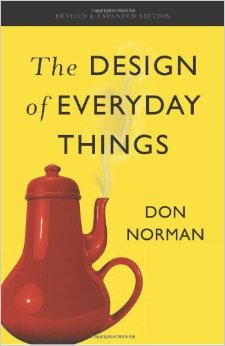
BOOK REVIEW and AUTHOR INTERVIEW
The DESIGN of EVERYDAY THINGS
By Don Norman
The book is engaging for all type of readers whether it is technical people, designer, non-designers or everyone else. The author’s goals are for everyone to become great observers of design and to find technology which is usable and understandable and to fix those designs that do not work. His designs principles are based on psychology, on the nature of human cognition, emotion, action, and interaction of the world. In his book, he covers everyday things, focusing on the interaction between technology and people to make sure that the products actually fulfill human needs while being understandable and usable. The author enhances people’s understanding of what can be done, what is happening, and what has just occurred. He draws upon principles of psychology, design, art, and emotion and discusses some of the most important characteristics of good design such as discoverability and understanding. Discoverability means is it possible to even figure out what actions are possible and where and how to perform them. Understanding encompasses such questions as what does it all mean. How is the product supposed to be used? What do all the different controls and settings mean?
He talks about affordance and anti-affordance which define what actions or the prevention of interaction are possible with the device and if they cannot be perceived the use signifiers or some way of signaling is required. He discusses mapping the relationship between the elements of the two things, feedback and conceptual models of design. Good and bad examples of designs are provided as he examines doors, scissors, alarm clocks, faucets, refrigerators and other everyday devices.
The author states whether the device is a door, stove, mobile phone or nuclear power plant the relevant components must be visible, and they must communicate the correct message. There are too many products that have too many functions and controls. He explained how some home appliances should not look like a spaceship or the design is lost. The author explains much of the design is done by engineers who are experts in technology, but limited in their understanding of people. Engineers are trained to be logically. They are designing for people the way they like them to be, not for the way they really our and since even experts make errors they must design machines on the assumption that people will make errors.
The author solution to better designs is to use the human-centered design (HCD) approach that puts human needs, abilities and behavior first. The design accommodates the needs, capabilities, and ways of human behavior and is a design philosophy and a set of procedures. Good design the author states requires good communication especially from machine to person indicating what actions are possible, what is happening and what is about to happen. The most satisfaction a person receives is when a device calls your attention to, you understand and take action, and the problem is solved.
The author provides seven stages of action. There was one for goals, three for execution, and three for evaluation:
1. Goal – form the goal
2. Plan – the action
3. Specify – an action sequence
4. Perform- the action sequence
5. Perceive – the state of the world
6. Interpret – the perception
7. Compare – the outcome with the goal
The author discusses how useful these seven stages along with three levels of human processing (reflective, behavioral, and visceral) which integrate cognition and emotion assist in designing. These observations from the stages and processing lead to his seven fundamental principles of design:
1. Discoverability – it is possible to determine what actions are possible and the current state of the device.
2. Feedback- there is full and continuous about the results of actions.
3. Conceptual model – the design projects all the information needed to create a good model of the system, leading to understanding and control.
4. Affordance – the proper affordance exist to make the desired actions possible.
5. Signifiers – effective use ensures discoverability and feedback.
6. Mappings – the relationship between controls and their actions follow the principles of good mapping.
7. Constraints – the device provide physical, logical, semantic and cultural constraints guiding actions and easing interpretation.
Don Norman has one self imposed rule. He states “Don’t criticize unless you can do better.” He wants everyone to appreciate good design and one way to get a better insight of good design is trying to understand bad designs with their causes and possible fixes. In his book, he also discusses knowledge in the head and in the world affecting mapping and constraints in design and emphasizes there are no human errors but bad designs.
The main point of The Design of Everyday Things is the importance of producing products that fit the needs and capabilities of people. Designs can be altered by different concerns. It can be altered by technology, or business pressures, but the focus of the book is human-centered design (HCD). Using observation, generation, prototyping and testing, HCD process makes sure people’s needs are met and that the product is comprehensible, usable and it accomplishes the task in an encouraging manner. A well designed device follows human-centered design, the seven stages of action and the principles of design.
Don’s Norman book has accentuated the “E’ in STEM for my project. The book has provided some great resources to include in future implementation of my DreamIT project. This fall, as my students reversed engineered a Dyson vacuum they have focused on the science, technology and math used in the vacuum. They also have looked at the engineering aspects such as choice, use of materials and examined the overall layout and user friendly design. The Design of Everyday Things with its stages, processes and human-centered design philosophy and procedure will enable me to explore the design process even further with my students. Don Norman’s book first published in 1988 and revised and expanded in 2013 encourages everyone to continue observing on what makes a good and bad design of everyday things.
Phone Interview with Don Norman
Thank You for your time! I know you are a busy man. I have a few questions and if we don’t get to them all because of your schedule I understand.
Don Norman: We have about 40 minutes for the interview.
Just to review my name is Manny Acevedo from Chicago and I am pursuing a Michigan State University – Wipro Graduate Certificate in STEM which is a year-long program. I read your book because your book works well with my reverse engineering project and one my professor’s has reference your book in class. I selected an everyday item similar to what you have done in your book. I reversed engineered a Dyson vacuum cleaner with my students covering the science behind the device such as force, math with the design specifications, and the cyclone technology. Yet, it was the design engineering behind the device that fascinated my students.
How did you get started in your field?
My career was a complete accident every single step of it. In fact I recommend to people just to be prepared. I discovered radio at an early age and tried to understand radios because I was fascinated by the fact it was invisible. There was nothing to see how it works and that made me invested in engineering which made me go to MIT as an undergraduate. I started off in electrical engineering and received a degree in electrical engineering. Afterwards, I was searching for a job and somehow ended up going to graduate school in Pennsylvania in electrical engineering. I was interested in computers but it turned out there was no computer studies at the University of Pennsylvania at that time. So I got a Master degree and then started looking for a job. The Psychology Department said we are starting a new program in mathematical psychology and why don’t you join us. And I did. Because I said I wanted to build computers but I can’t so maybe I study the human who is a powerful computer. I joined the department and that is how I became a psychologist.
What motivated you to write the first edition in 1988?
I got my first job at Harvard and then they started this university in San Diego where I am right now. A brand new university having not graduated any students. I help develop informational processing psychology which today is called cognitive psychology. Along the way, I studied lots of things and then got interested in errors that people make. By understanding errors, I realized most errors were caused by design by bad design. I was taking a sabbatical year of leave and when I was England I could not work the water faucets, the light switches and the doors. I said look the principles I have been studying tells me how to do this right. I was frustrated in England so I just sat down and wrote the book.
What was your intended audience at the time? Was it for design engineers?
I actually did not know the design field. I just wrote for the everyday person. I just wanted people to know when they have trouble it was not their fault. There are three things in the book. One is not your fault. Second to the teach people to be observant about the design world and third develop some important principles of design for the design community like affordances, constraints, conceptual model. It served these audiences very well. Twenty five years later the book was still selling very well but the examples were outdated and you read my preface and know why I revised it.
I reversed engineered a Dyson vacuum cleaner with my students and explored the bag less technology behind the product.
What do you think of using a vacuum cleaner as a design engineer project?
The basic vacuum cleaner is really simple there is a big fan and a bag. Air rushes into through the bag and any dirt gets trap in the bag. This is the human factor part. There were three problems with the bag. First, as they got more filled the vacuum cleaner was less effective. Second, the bags let some of dirt through and it was simply spreading the dirt around the house. Finally, people hated emptying the cleaner it was a nuisance. How can you solve that problem and how can you make the air that comes in not have to pass through the bag? Dyson started off with the problem. With technology you start off on how can we make it better and he ended up with this very brilliant solution that many companies now have copied. This is what you should tell your students to think about in their own lives. Think about what things they really don’t like doing in life and tell them that’s not a problem but an opportunity for them to invent something that makes it better.
I enjoyed your discussion about failure in your book that it is a great learning opportunity can you explain even further?
I am going to get the rid of the word failure and replace it with learning experience. It is learning frequently, learning quickly and always be learning. If you look at Dyson vacuum cleaner his first tests failed. One of the most important things to teach your students is using failure as a learning experience.
What are your thoughts about the STEM progress going on in our schools?
I am not an expert because I don’t work in that field but I have friends who do but at the STEM level there is this tremendous interest in bringing STEM education to K-12 students. This is a really good question and there is a lot of good work going around but people are really experimenting and don’t exactly know the best way to do it.
What are your thoughts about using an alarm clock for my next project?
The alarm clock is a favorite topic for many design schools. Students love to design new alarm clock that will wake them up. A group at MIT actually designed a new alarm clock and when it rang and you tried to touch it would run away from you and jump to the floor and roll away. An alarm clock would be a lot of fun for your students. Make your students aware if they have trouble with a device that everybody has troubles with devices and they should observe people and not say this is a stupid person. If their parents or grandparents can’t use a new telephone or computer they need to try and understand where the difficulty is and remember it is not the persons fault but the design. You have to give your student the right way of looking at things and when they themselves have trouble they can’t think they are stupid and not tell anybody. This is a challenge to get them to observe the world and people going around and always watching which is very valuable.
We have something in our program called World of Wonder are WOW moment. These are thoughts or ideas that we come across. I did a WOW about the human body. I knew fingerprints were unique but researching my WOW discovered we also have tongue prints that are unique. I also discovered that when we sneeze it travels at 100 miles per hour. One of my favorite WOWS is one of my professor’s tweets on why Yogi Bear wears a collar and tie. She discovered it was to keep animations cost down. Yogi having a collar and tie enabled animators just to rotate his head and reuse his body over and over again.
Do you have a World of Wonder you can share?
I know it is a tough question.
Actually that is a very clever example you gave me. I just had a talk two days ago with one of the great animators who helped develop some of those early cartoons and he talk a lot about the tricks they had to do. I actually studied where you should sit in a movie theater. I learn once from a movie director on where you should sit. You should sit at the same angle that the camera had and that the director had in mind. So what I always do is make an angle with my two hands which is about 30 to 35 degree angle and then I walk into the theater and I walk until the screen is that angle which is usually much closer than most people sit. It feels uncomfortable at first but when the movie starts you get in engross in the movie much better and you are a part of the movie. It is trick I learn to think about what the director had in mind on what you should see. I want the best view where I feel I am a part of the movie.
Do you have any other thoughts about your book and the design process?
Designing to me is a fascinating field it puts together all the knowledge we have about people and technology about business and how things work. Somebody just came to me complaining that the labels on the outside of the elevators in an airport did not match the labels in the inside of the elevator. She said that it was really stupid. I told her you have to realize different people did them. Different people designed the elevator. Different people installed it and probably even different people put the labels in. You have to realize there are so many different groups of people in the design process. For example, an electrician knows he needs to put a light switch in the room but he does not know how the room is going to be used. One of the hardest parts about the design process is not the design it is coordinating all these different groups to make something like a school or classroom work together.
Thank you I appreciate you taking the time to speak with me.
Sounds to me you are doing some really exciting things. So keep at it.